AD Artbox Help
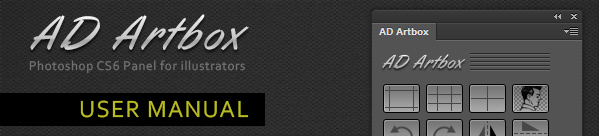
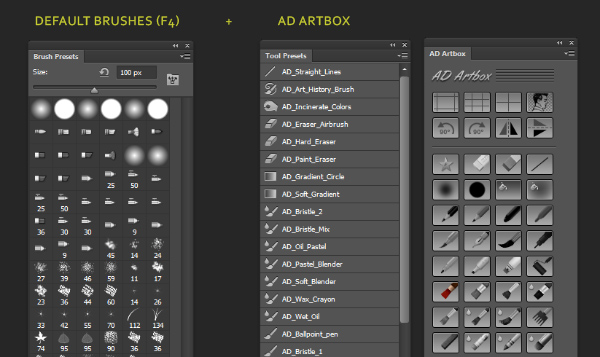
AD Artbox it’s a brand new Photoshop CS6 / CC & CC 2014 Panel with more than sixty high quality tools for illustrators. Designed for everyday work, each of the tools can be modified from the “tool presets” window, that means you could, for example, add your favorite brush to the panel or change any of the tools included. AD Artbox is intuitive and easy to use!
HELP CONTENTS
- Installation
- Guidelines: Bleed, Thirds and Middle
- Separate lines from background
- Favorite Tool (Tools modification and replacement)
- Straight lines
- Linear and radial gradient
- Laggy or Slow tools
- Blenders
- Watercolours
- Tint
- Leaves and Fur
- Incinerate colors and Burn Light
- Create comic panels
- Halftone (CMYK Fx)
- Folder texture
- Layer texture
- Solution for common troubles
- License (Single user)
1. INSTALLATION IN PS CS6
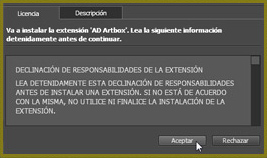
1. As when launched AD Artbox will replace some already loaded files, please, backup your Tool Presets, Patterns and actions and close Adobe Photoshop.
2. Open the Adobe Extension Manager, CS6 or CC depending of the version you’re going to install. If you are using the Extension Manager CC check that PS CC 2014 is listed (If not, I recommend to search for solutions to that known bug at Adobe Forums:
https://forums.adobe.com/community/creativesuites/extensionmanager ).
3. Select the install button at the top of the Extension Manger window.
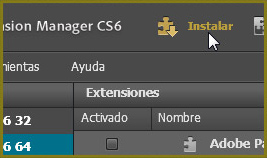
4. Locate, and select, the ZXP file included in the download.
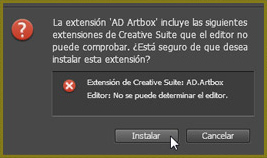
5. Follow the instructions and install the panel. Don’t worry about the Alert message about an Unknown Editor, just install the extension downloaded from this website.
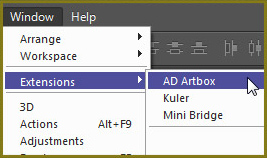
6. Once installed, you can access the AD Artbox Panel from the Photoshop Menu:
Window > Extensions > AD Artbox
2. GUIDE LINES: BLEED, THIRDS & MIDDLE
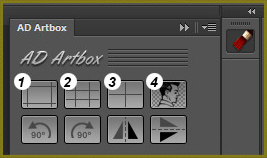
1. BLEED
This button will create four guidelines at 1 cm. from the edge of the paper inward.
2. THIRDS
This divide the document into ‘thirds’ with vertical and horizontal guidelines.
3. MIDDLE
It creates guidelines at the vertical and horizontal center of your document.
Tips:
When working with guidelines it is recommended to lock them from the menu:
View > Lock Guides
also, from the same menu there’s an option to Clear all the Guidelines.
To delete or move individual guides you must enable the rules, then drag the guide to the ruler to dele it or drag from the ruler to the document to create it.
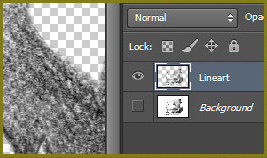
3. SEPARATE LINES FROM BACKGROUND
4. Open an scanned drawing, clean it, adjust the levels (Ctrl + L) and then apply this action. Quickly the background will be removed from the artwork in a new (grayscale) layer!
Tip: Instead of using the eraser to clean your drawing, try to use the dodge tool (set Range to ‘Highlights’ and the Exposure to a low number).
4. FAVORITE TOOL (Tools modification and replacement)
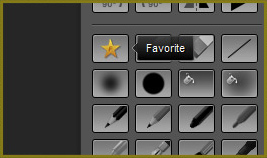
1. By default the Favorite tool is the ‘Soft Oil’ (in AD Artbox 2 there’s a new favorite oil brush!) but it is easy to change it, here is the how-to:
2. Open the Tool Presets Windows (Window > Tool Presets).
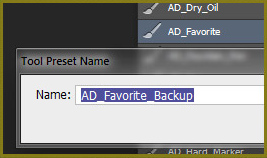
3. Uncheck the box ‘Current tool only’ and search for the preset ‘AD_Favorite’,
double click it, copy the name to the clipboard and rename that preset to something like ‘AD_Favorite_Backup’.
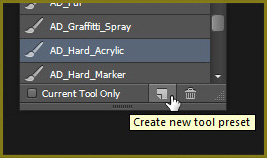
4. Select the Tool Preset you want as Favorite and Save it as a new preset using the name you previously copied to the clipboard (Ctrl + V): ‘AD_Favorite’.
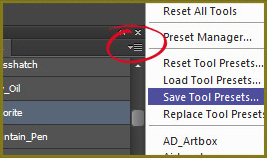
5. Finally Save those changes:
Go to ‘Save Tool Presets’ and save the set to the default Photoshop Tools folder (C:\Program Files\Adobe\Adobe Photoshop CS6 (64 Bit)\Presets\Tools) with the same name: AD_Artbox.tpl
Note: All the Tool Presets names must remain intact, otherwise AD Artbox will not work properly. So, you could change all the presets, that’s possible, but there should always be the same quantity of presets with the same original names.
Tip: If you want to put as Favorite any other Brush you created or downloaded, just load that brush as usually and then Save it as a New Tool Preset as indicated in step 4.
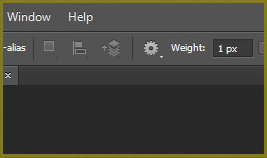
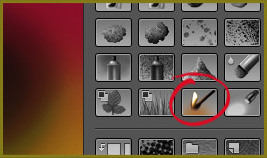
5. STRAIGHT LINES
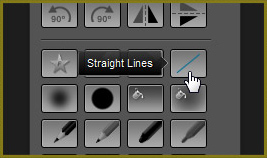
1. There is no mystery with this tool, as its name suggests it draws straight lines, but like many other tools this one has some options that you can access from the top bar.
By default the line thickness is 1px but you can change that.
6. LINEAR AND RADIAL GRADIENTS
1. These two buttons provide quick access for creating linear and radial gradients. The usage is as simple as click and drag, to achieve perfectly vertical or horizontal gradients just hold down the Shift key while dragging.

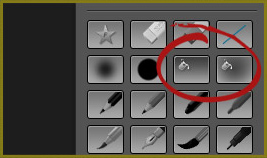
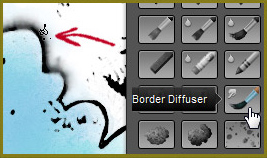
7. LAGGY AND SLOW TOOLS
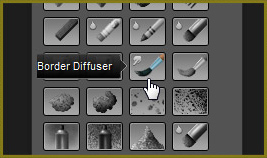
It is important to understand that not all this tools work allways smoothly, the proper functioning depends of certain conditions, mainly on the power of our hardware.
Eg.: the ‘Border Diffuser’ tool could by quite slow if it’s used as any other brush, but if used without enlarging and slowly it produces great results.
What it does is smudge the lines creating the effect of “wetness” or wet ink.
8. BLENDERS

There are two blenders in this panel, the first one (Pink) named “Pastel blender” mix the colors using an ‘artistic’ and textured brush.
The second one (Blue) is called “Soft blender” and works very smoothly.
In both cases all the options can be changed from the top bar.

9. WATERCOLOURS
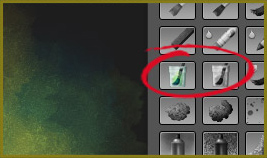
These two fantastic brushes produce a real effect of water-based paint, complemented very well one with each other.
Tip: Sometimes it is very useful to tweak the settings a little bit, this way:
1. Select the brush (Watercolour 1 or 2)
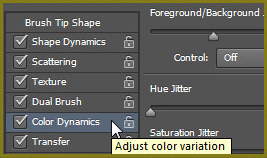
2. Open the Brushes configuration window (F5)
3. Tick the “Color Dynamics” option, and change the Foreground / Background to a number between 30 and 50, leaving the remaining options in 0. Then, when painting, select a foreground and a background color that automatically will mix together.
Note: With AD Artbox 2 the Watercolour 2 was improved, just try it!
10. TINT
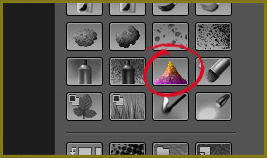
This is a brush that instead of ‘painting’ what it does is ‘dyeing’ with the color you’ve selected.
11. LEAVES AND FUR
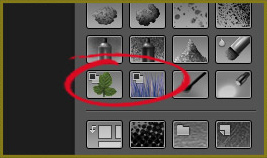
1. LEAVES: It produces an effect similar to the foliage of a tree (it was updated with AD Artbox 2)
2. FUR: In this case the effect is similar to the fur of an animal or creature,
but also could be used as grass.

Note: In both cases it is essential to select a foreground and a background color.
12. INCINERATE COLORS (Burn Tool)
Although I have changed the name is a PS classic tool that works pretty well for certain kinds of paint or effects, Darkening and saturating the colors.
Just use it on any painted surface to understand how it works.
BURN LIGHT
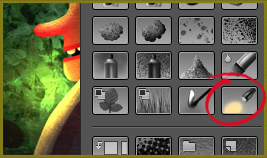
Don’t confuse this brush with the ‘Dodge Tool’. The effect is -in some way- similar but this one is just a smooth brush with an special effect to generate some kind of luminosity. Use it with white or very clear colors over a dark surface.
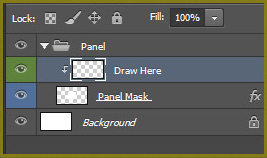
13. CREATE COMIC PANELS
1. One click, one panel.
What this button makes is to create a ‘clipping mask’ (the panel shape) that hides everything outside the panel, so we have two layers inside a folder:
one named “Draw Here” where obviously we draw, and the other with the shape of our panel, both layers are inside a folder to facilitate the movement and relocation of our panels.
HOW TO CREATE MULTIPLE PANELS
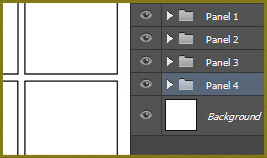
1. Create a new blank document.
2. Create your first Panel and rename it to something like ‘Panel 1’.
Place your panel where you want it.
3. Select the Background and create a New Panel. Rename it. Place it in place.
4. Repeat steps 2 & 3 until you have all your panels created.
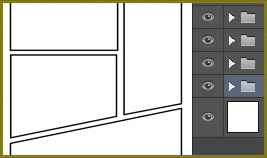
Tips: 1. To change the size and/or shape of a panel just select the layer ‘Panel Mask’, Enable the transformation tool (Ctrl + T) and Rescale, distort, rotate, etc., your panels.
2. Also you could change the border size and color editing the ‘Panel Mask’ layer fx.
3. You probably will need to use guidelines for the page layout, well… the Guideguide panel is highly recommend to do that work: http://guideguide.me
14. HALFTONE
This button will create a new Smart Object layer with a flattened version of your document with editable CMYK Halftone.
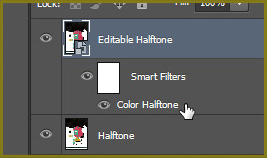
EDITING THE HALFTONE
1. Double-click the small thumbnail in the ‘Halftone’ layer to open the editable object.

2. Inside that ‘Smart Object’ you’ll find another Smart Object called ‘Editable Halftone’ with a filter applied. Just double-click ‘color halftone’ to open the ‘Color Halftone’ window.
I recommend to leave the Screen Angles without altering but to play with the Max. Radius using a number between 4 and 127 (small to big dots).
When satisfied, save that document (just Ctrl + S, don’t save it to other place) and close it. Your original ‘Smart Object’ layer will be automatically updated.
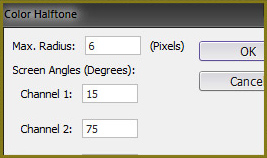
Tip: Change the mode of the Halftone layer to Soft Light and reduce the opacity to mix the halftone with the original.
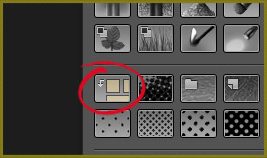
15. FOLDER TEXTURE
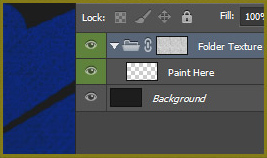
This will create a new folder with a mask containing a texture, so everything you draw or paint inside that folder will receive the effect of the texture.
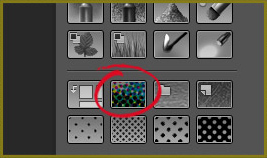
Tip: To change the texture just copy a new texture to the clipboard, press the Alt key and click the texture thumbnail, paste your texture and click the folder icon to return the normal mode.
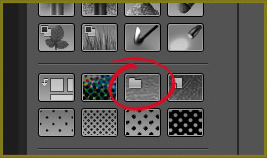
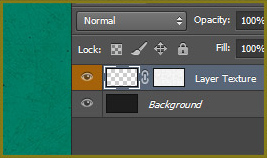
16. LAYER TEXTURE
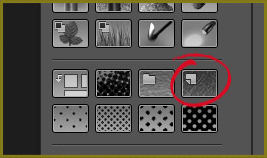
It creates a new layer with a textured mask, so everything painted in that layer will be textured. As with ‘Folder texture’ you could change the texture, the same way.
17. SOLUTIONS FOR COMMON TROUBLES
This panel was tested and used intensively, it is supposed that following this instructions you could work with it without any trouble at all, but lets see some things to take care of…
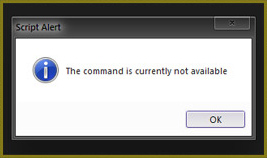
1. AD Artbox works and requires some sets of tools: the AD Artbox Patterns, Actions (only in CS6) and Preset Tools, without any of those sets loaded you will receive an error message like: “The command is not currently available”. Then if you are using AD Artbox take care of not replacing or delete any of those sets!
2. When I launch AD Artbox, it replaces some of my presets (patterns, Tools and actions): Can I use other patterns, tools or actions at the same time I’m using Artbox?
Yes! but you must launch Artbox first and then load any other file without replacing the Artbox presets.
3. What if I want to work with AD Artbox and another set of brushes?
AD Artbox loads its brushes from the Preset tools so you could use any set of brushes in the default brushes window. There’s no conflict with that.
But… you can’t use AD Artbox with a different set of Tool Presets (Eg.: The Cartoonist Brushes) except you load the extra set (not replacing the AD Artbox Tool Presets) each time you want to work with both sets, said that note there are more than 60 tools inside AD Artbox, loading an extra file could slow down your Photoshop, depending on your setup, so take care!.
4. If you modify any of the tools provided with AD Artbox don’t forget to save it because each time AD Artbox is loaded it replaces the tools with the ones installed in the default PS folder (this is to avoid other problems).
5. ERROR: The command “Select” is not currently available”
Usually this happens when we have activated the option “Current tool only” in the bottom of the Tool Presets window (Window > Tool Presets)

6. Photoshop is closing unexpectedly after open the AD Artbox panel.
A few users with Mac Os X 10.8.4 have had that issue and it was solved updating Photoshop CS6 from 13.0.0 to 13.0.4
Photoshop 13.0.4 update for CS6 (Mac)
NOTE: This Panel was created under Windows 7 with a Pc Intel Core I7 3770 @ 3.40Ghz + 8gb RAM + NVIDIA GeForce GT 620 and using a Wacom Intuos 4 tablet
tested also in a Mac Book Pro with OS X Mountain Lion versión 10.8 with 4 and 16 GB RAM
18. LICENSE OF USE (SINGLE USER)
One purchase means one license, so you are allowed to use this panel and the included tools on a single machine.
For studios or companies I recommend to buy a bulk license for multiple installs, I offer discounts for up to five machines, just email me to alexdukal (at) gmail.com
You’re strictly not allowed to redistribute, modify and/or sell or share these resources.